
1. Authoring Scenario #
First, use Stego (scenario authoring tool) to create a scenario where you want to test the app.
If you don’t know how to create a scenario, or if you have a problem, please refer to the topic ‘ Scenario writing and execution ‘.
If you have finished writing, you can prepare the scenario upload in the form of a zip file through export.
2. Upload an app to a project #
Next, you need to upload an app to play the scenario to the project where you want to store the scenario.

Step 1 . Click the Projects button on the sidebar.

Step 2 . Click the cogwheel icon located on the right side of the project where you want to upload the app.

Step 3 . Click the ‘App Repository’ tab
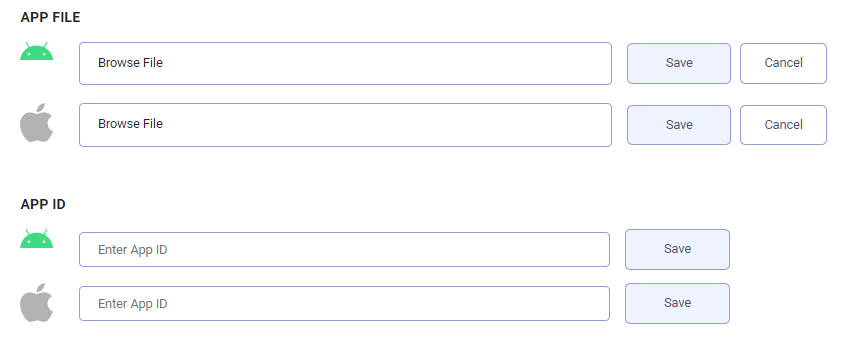
There are two ways to upload an app. It is a way to upload a file directly or register an app ID.
- Upload files directly
Step 1. Click the Browse File button.
Step 2. Select the file to upload.
Step 3. Click the save button.
- Register App ID.
If the app is launched at the app store, you can use the APP ID to fetch its binary file automatically from the app store. You can store an APP ID for each apk and ipa respectively.
You can change uploaded files with ‘edit’ button, or delete it through ‘delete’ button.
– How to register App ID (apk)
Step 1. Log in to your AdMob account at https://apps.admob.com.
Step 2. Click the app in the sidebar.
Step 3. Click All Apps.
Step 4. Click the ‘copy’ icon in the App ID column to copy the ID of the app.
Step 5. Enter the ID in ‘Enter App ID’ box next to Android icon and click the save button.
– How to register App ID (ipa)
Step 1. Go to the App Store (https://www.apple.com/kr/app-store/) and search for the app you want to find.
Step 2. Save the unique number id of the last part of url.
Step 3. Search the browser for the address below.
https://itunes.apple.com/lookup?id=unique number
Step 4. Download the txt file and find the bundle id.
Step 5. Enter the ID in ‘Enter App ID’ box next to Apple icon and click the save button.
3. Upload Scenario #
Upload the scenario in your project.

Step 1. Click the ‘Scenario Repository’ tab and then click the ‘Create Scenario’.
Step 2. Enter scenario information to upload.
– Scenario Name : Enter a name for the scenario to upload.
– APP ID : Select the app you uploaded in the second step to run the scenario.
– OS : Select the OS type of the device on which you want to run the scenario.
– Scenario File upload : Drag drop or click to upload your own file.
Step 3. Press Save button.
4. Start new app test #

Please refer to “Testing Mobile App” for further instruction.
5. Run test #
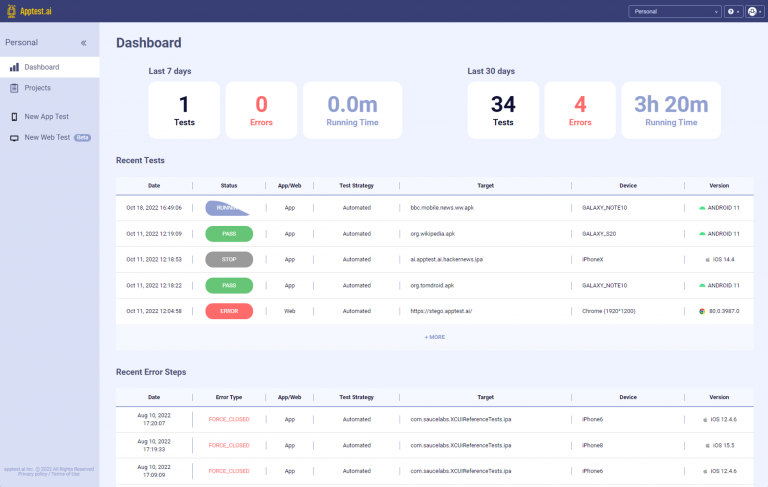
When you complete the test setup, the start test button at the bottom of the page is activated.
Clicking it will start testing and then it will switch to the dashboard page to view the real time progress of the testing in the ‘Recent Test’ table.