1. Creating a new mobile app test #


Here are descriptions for each test :
- “Autonomous Test” – An exploratory test.
- “Scenario Test” – A test executed with a scenario written with Stego.

Select the ‘Run’ button(▷) located on the right side of the Project List.
2. Select project #

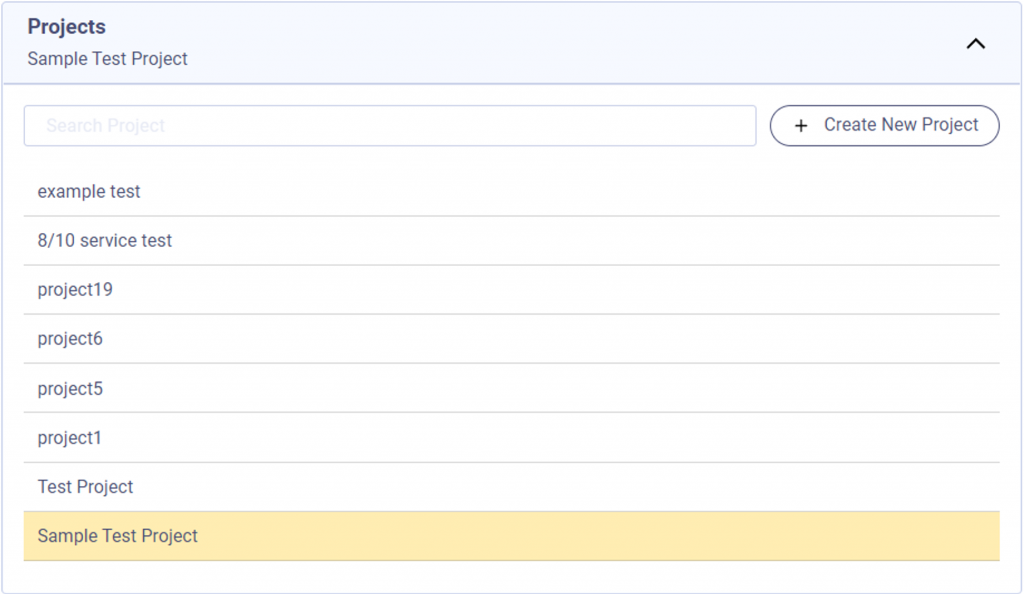
Projects are very similar to directory in the file system.
Clicking a project item will print out a list of projects that you can select.
If you have never created a project, only the default “Sample Test Project” will be available
Adding a new project can be achieved by clicking “Create a project”.
Once you have decided which project you want to conduct the test on, select that project.
3. Select test scenario #

Initially, the only test scenario you can select is “Default (AI Testbot).”
If you uploaded a scenario that you created using Stego, the list of scenarios that you uploaded will be printed out.
“Default (AI Testbot)” option is a fascinating robotic testing scheme where it doesn’t require your test scenario at all. On the other hand, if you wish to test with your own test scenario, you can do that by selecting an uploaded test scenario.
Please note that your test scenario must be made with Stego and be uploaded beforehand to the corresponding Project.
Selecting “Default (AI Testbot)” allows the AI Testbot to recognize and judge the screen of the smartphone, determine its own search path, and conduct a fully autonomous search test without a separate scenario.
4. Set up test app #

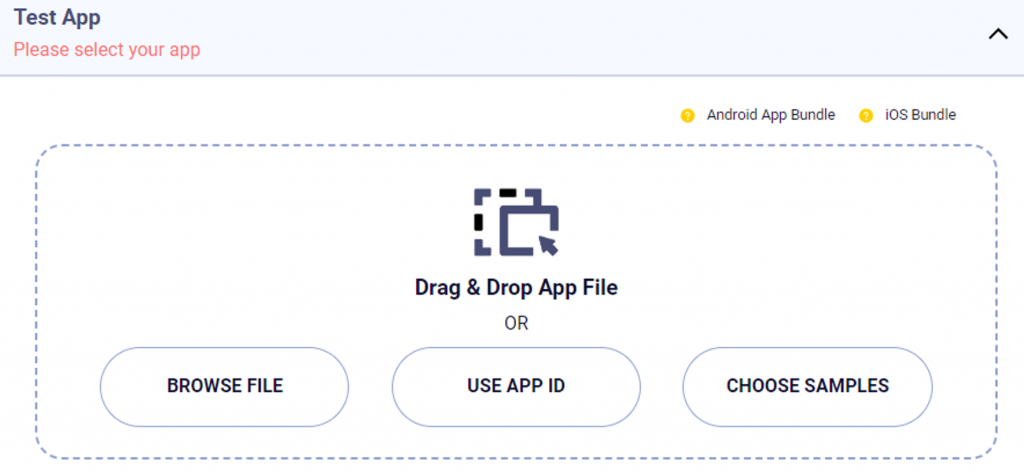
Set up the app to run the test. There are three ways to set up a test app: upload a file directly, use an APP ID, and select a sample app. Set up the test app in any of the three ways.
Upload file: If you have uploaded the app file in the project settings in advance, or if you want to upload the app directly, you can click Browse File to import the file or upload it directly by dropping the file into the dotted square.
APP ID : You can use APP ID to specify your test app file. This is convenient option if you don’t have your app binary files but available at the App Store or Play Store. If you are testing multiple times within the Project, we recommend to store your APP ID in your Project and browse it here.
Select samples: We provides sample demo apps for you to kick-start and experience our AI testing.
5. Set up device #
For free users #

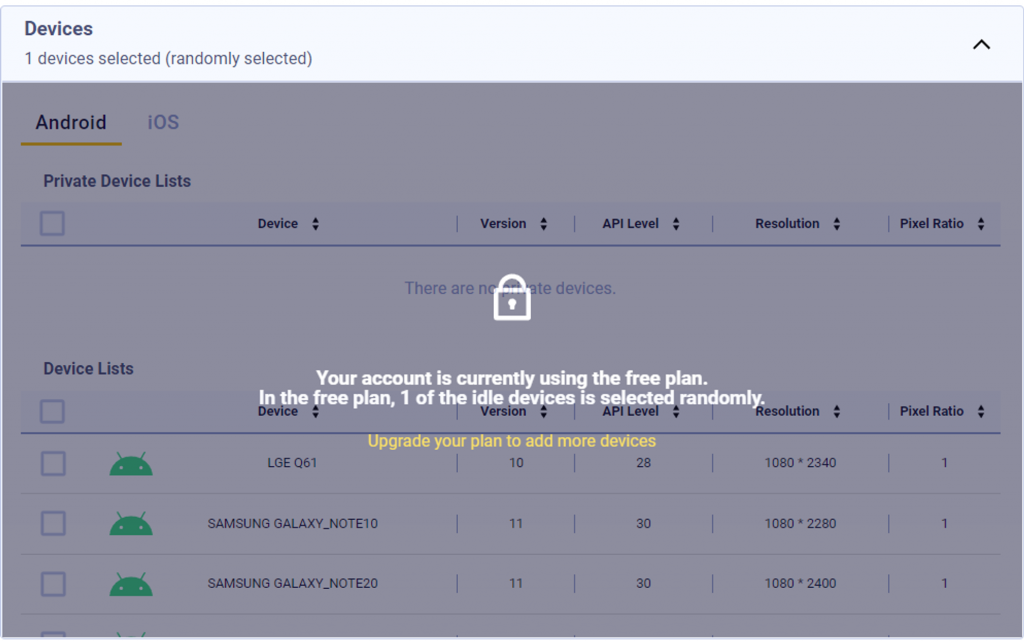
For free users, only one device can be used for testing. Moreover, the teste device will be randomly picked and assigned from our available devices for testing.
If you want to choose your own device type or increase number of devices to test, please upgrade to a paid plan.
For paid users #

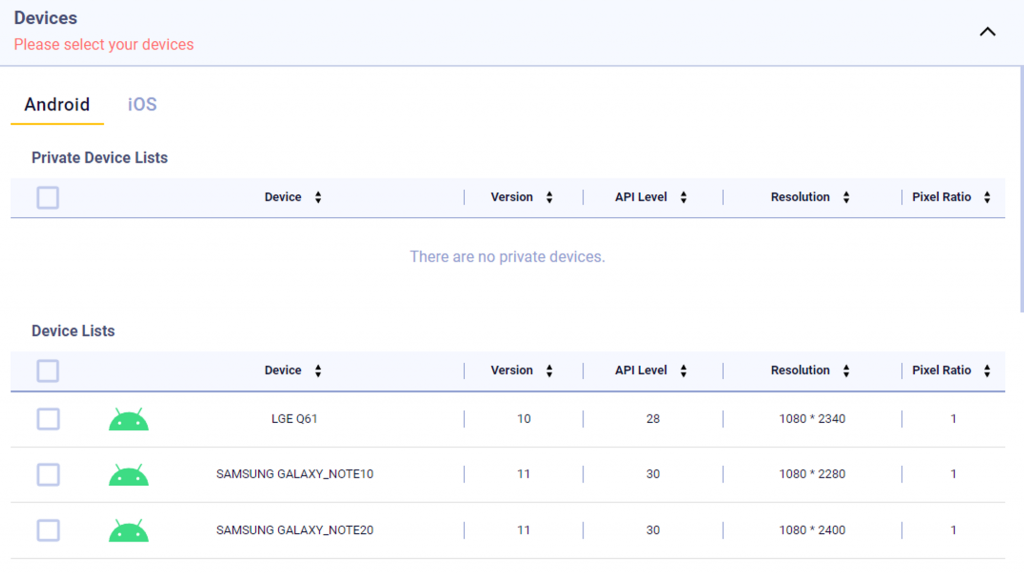
From the Device Lists, you can select as many devices as you want. When using the “Enterprise” plan, additional customized private devices can be set up and used.
6. Set options #
Set other test options.
1. Test timeout: You can set the timeout value for testing from a minimum of 5 minutes to a maximum time limit in your account. By default, 15 minutes is set.
2. Test Device Language : Allows you to set the language of the device to be tested.
3. Set login information: You can pre-set the default login information to be used when challenged for login.
7. Set advanced options (Optional) #
You can set more detailed options. You can run the test without setting this option.
① Hinting feature: In the field box, enter the value of label, placeholder, input type, resource id among the attributes of the input element that you will encounter during the test, and then enter the value in the input element with the attribute value described in the field. You can set multiple values by clicking the Add icon and delete them by clicking the trash can icon on the right.
You can set multiple values by clicking the Add icon and delete them by clicking the trash can icon on the right.
② AT&T Video Optimizer (ARO): Provides performance optimization reports based on AT&T Video Optimizer best practices during the check.
– AT&T Video Optimizer is a free open source tool for developers and testers that provides recommendations for optimizing the network performance of videos and applications on mobile devices.
③ Use Proxy: A feature that can be enabled when you want to enable HAR information during web testing. HAR information appears in a pop-up window when you click the action icon on the screen thumbnail on the Screen tab of the test results page.
④ ODM : A function to detect images on the screen during app navigation. This is an essential feature for app testing and is checked by default.
⑤ Re-Sign: When testing the iOS app, re-signing the iOS app in the process of unpacking and repackaging it may be needed. It is checked by default as an essential feature.
⑥ Web Contents Debugging: When checked, debugging of ‘Web View’ page embedded in the app can be enabled.
⑦ Extra Data : Saves the environment values to be passed to the server in JSON format for the service instrumentation. (for very advanced users)
8. Run test #

When you complete the test setup, the start test button at the bottom of the page is activated.
Clicking it will start testing and then it will switch to the dashboard page to view the real time progress of the testing in the ‘Recent Test’ table.
