Basic screen configuration #
When Stego is launched, a screen consisting of 6 elements appears as shown below.
① Menu bar
Most of the features provided by Stego are categorized in the menu bar.
② Scenario Management
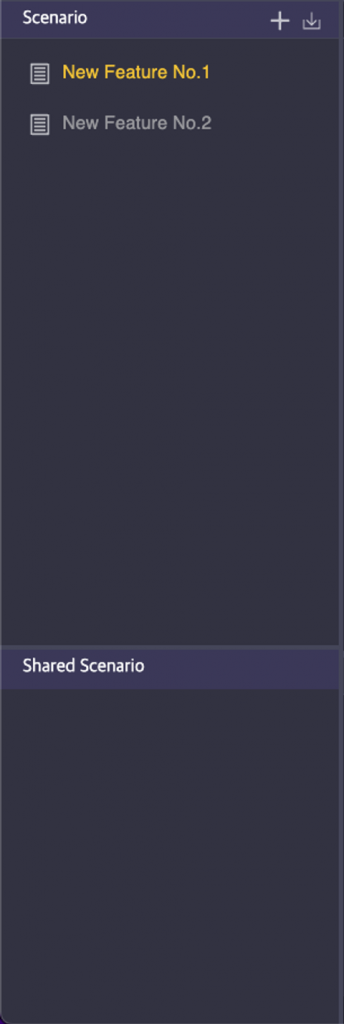
This is where you can manage the scenarios contained in the workspace. You can create, edit or delete a test step to the scenario. In addition, you can manage shared scenarios that can include scenarios you have already written in other scenarios, and you can import exported scenarios.
③ Scenario creation panel
You can create, modify, and run scenarios.
④ Device
In the device panel, you can connect and disconnect devices, and the name of the connected device is displayed. In addition, you can manipulate the mirrored screen of the connected device or preview the visual screen analysis by AI Vision engine.
⑤ Screen analysis tool (UIObject Selector)
The screen analysis tool analyzes the screen using various AI Vision technologies and provides the user with various elements (icons, text, selection window, etc.) composing the screen. You can select this AI-curated visual element and drag it to a scenario step in order to create a specific testing step.
Basic usage #
Step 1. Launch ‘Stego’.
Step 2. Connect your device.
Step 3. Either create a new workspace or open an existing workspace.
Step 4. Create a new scenario or select one that already exists.
Step 5. Add a new step or modify an existing one.
Step 6. Test the completed scenario by following steps 3-5.
※ You can quickly learn how to use Stego through various examples in the Tutorial. ->Go to Tutorial
※ If there is a new version of Stego available, it will automatically update at start up.

Menu Bar #
※ You can use each menu simply by using the description on the right side of the menu name.
Stego #

- About “Stego” : The version information for Stego is printed.
- Preferences : You can check Xcode Signing Option settings and Android Home settings, and so on.
- Check for Update : Check for updates to Stego.
- Hide Stego : Hide Stego from the screen.
- Hide Others : Hide other apps that are currently running.
- Show All : Displays other apps hidden above.
Workspace #

- Open : A window appears where you can create, modify, or delete a workspace.
File #
- New Scenario : Create a new scenario in the current workspace.
- New Step : Create a new step in the current scenario.
- Save : Save the scenario you are working on.
- Cut : Cut the text.
- Copy : Copy the text.
- Paste : Paste the copied text.
- Select All : Select all text.
Debug #
- Play : Run the current scenario from scratch.
View #
- Reload : Reloads the Stego window.
- Reset Panel : Resize all panels to default.
- Toggle Full Screen : Switch from window to full screen and from full screen and vice versa.
- Cancel Full Screen : Disables the full screen.
- Change Language : Change Language setting of Stego. (English / Korean)
Window #
- Minimize : Minimize the Stego window.
Help #
- Learn More : Open the link ‘Stego user guide’.
Workspace #
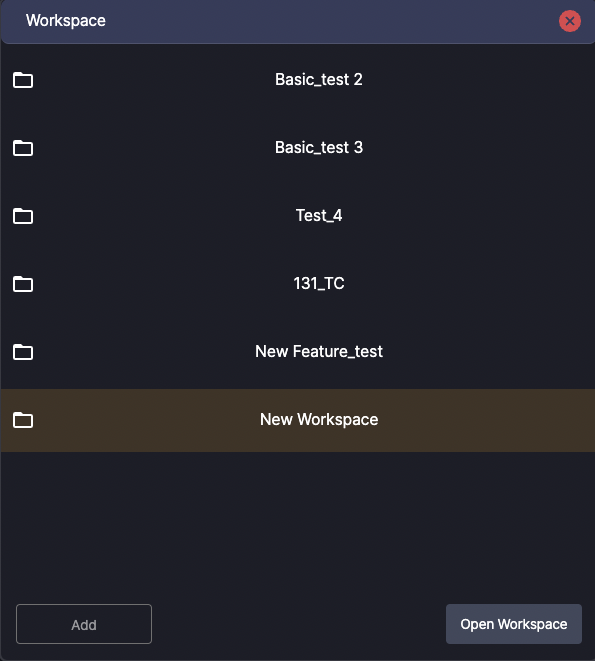
To get started, you first need a workspace to manage multiple scenarios.
Show Workspace Management Window #
You can display the workspace management window in two ways:

Step 1. Click Menu bar > Workspace > Open

Step 2. Enter shortcut cmd + O
You can create a new workspace, or start creating scenarios using an existing workspace.
Create a new workspace #
Click the New Add button at the bottom of the Manage Workspace window to add a blank at the end of the workspace list, and enter a new workspace name in the blank to create a new workspace.
CAUTION) The workspace name cannot contain following special characters(@#$%^&*|/’;:/?).


Open Workspace #
Select any workspace item from the list and click Open Workspace button.
To rename/delete a workspace #
If you need to rename or delete a workspace, right-click the workspace to display the active Context Menu, and then use it.
CAUTION) You cannot delete a workspace that contains one or more scenarios.

Scenario #
The scenario consists of at least one or more test steps.
When scenario’s executed, steps in the scenario will be executed from the top on any device connected to Stego. You can check and modify the behavior of specific Step in the Attributes panel of Step. See the Scenario Creation and Execution part for instructions on how to create a scenario.
The Scenario panel on the left side of the screen contains a list of scenarios included in the workspace and features for management.

Create Scenario #
Any scenario can be created inside of a workspace.
(*See below for instructions)

① Current Workspace
② Click the “+” button at the top of the scenario list.
③ Enter a scenario name to complete the creation of a new scenario.
CAUTION) The workspace name cannot contain following special characters (`~!Cannot set scenario name including @#$%^&|/’;:/?*
Loading Scenarios #

Click the loading icon at the top of the Scenario Management panel to import the exported scenarios.
For a detailed instructions on exporting scenarios, see the topic on the “Scenario Export” page.
Scenario Context Menu #
Right-click on the scenario item to activate the Context menu.

Rename : To rename a scenario
Right-click the scenario you want to rename and click on the “Rename” menu.
Delete : To delete a scenario
Right-click the scenario you want to delete and click the “Delete” menu.
Share : Create Shared Scenario
Any scenario can be changed to a shared scenario by right-clicking on the “Share” menu in the scenario you created, or by dragging it to the Shared Scenario.
CAUTION) You cannot drag to Shared Scenario while modifying the scenario name.
💡 What is a shared scenario?
Shared scenario is a sub-scenario where it can be included and run from regular scenario. For example, if your app requires a login, you can create the login part as a shared scenario, and then keep using it repetitively from every scenarios you created. By doing so, you only need to write once for login and don’t need to write same login part for each scenario you create.
CAUTION) Shared scenarios can only be used within the same workspace. Also, nesting shared scenario within the other shared scenario is not allowed currently.
Make a copy : Copying Scenarios
If you are creating similar scenarios, it may be faster to copy and modify existing scenarios. To copy a scenario, right-click and click “Make a copy”.
Copy to other workspace : Copying Scenarios to Another Workspace
If you need to copy the scenario to another workspace, click on the “Copy to other workspace” menu and select the workspace you want to copy.
Device #
First. connect your device via USB from your PC. Then, open Stego and you can add the device you connected by pressing button in Device Management Area.

From Add Device Popup, list of available devices will displayed. You can add up to four of the devices in the Device Management Area for concurrent testing.

※There are three states of the devices.


DISCONNECTED : It is connected to the PC, but it is not connected to Stego.
CONNECTED : The device is connected with Stego.
UNTRUSTED : The device is connected to the PC, but the device is not allowed to connect to the PC. In this case, you need to enable “Do you want to allow USB debugging?” message on your device.
When the connection is complete, the screen shown below is displayed.

① The device name of the connected device is displayed.
② Disconnect button.
③ The mirrored screen of the selected device. Mirror sceen can be operated as if it’s real phone.
